 how-to
Strength Training With a Shoulder Injury: A Safe Guide
Table of Contents
- Before You Lift: Assessing Your Shoulder and Setting a Baseline
- Shoulder Friendly Strength Training Exercises That Build Real Strength
- Modifying Your Lifting Routine for Shoulder Pain
- How to Train Legs With a Shoulder Injury
- Warm-Up, Recovery, and Tissue Repair Habits
- Return-to-Sport Timeline and the Mental Side of Injury
- When to Work With a Coach
- Frequently Asked Questions
Last Updated: September 25, 2026
Before You Lift: Assessing Your Shoulder and Setting a Baseline
A shoulder injury does not have to end your time under the bar, but it does mean you need a plan. At Doug Briggs Strength, we leverage over 30 years of experience coaching athletes through setbacks like this, and the first step is always the same: know what you are working with.
Red Flags That Mean See a Doctor First
Some symptoms need a medical opinion before any training. Stop and get checked if you notice:
- Pain that wakes you at night or keeps you from sleeping
- Weakness so sudden you cannot lift your arm to shoulder height
- A visible deformity or a joint that feels like it slips out
- Numbness, tingling, or pain that shoots down your arm
- Sharp pain after a fall, collision, or pop you felt and heard
Pain-Free Range of Motion Check
Once cleared, find your safe zone. A pain-free range of motion is the arc your arm moves through without sharp pain or pinching.
Try these checks with no weight:
- Raise both arms straight overhead. Note where the injured side stops or pinches.
- Reach across your chest toward the opposite shoulder.
- Rotate your hand outward, like you are opening a door, with your elbow at your side.
Shoulder Friendly Strength Training Exercises That Build Real Strength
The best shoulder friendly strength training exercises build control before load. Start with moves that keep your arm close to your body and your effort low.
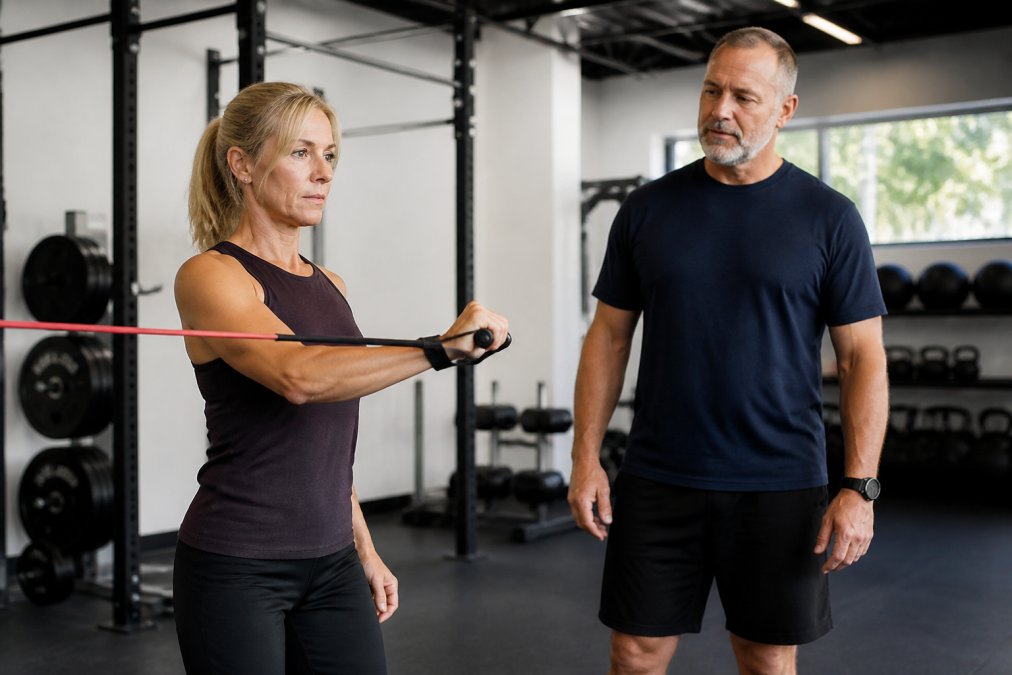
Isometric Holds and Pendulum Swings
Isometric exercises are contractions where the muscle works but the joint does not move. They build strength with almost no strain on the joint.
Here is a simple sequence:
- Stand facing a wall. Press your fist into it at chest height and hold for 20 to 30 seconds.
- Turn sideways and press your fist outward against the wall. Hold the same time.
- Repeat each direction for 3 rounds, resting 30 seconds between holds.
Scapular Retraction and Rotator Cuff Work
Your shoulder blade, or scapula, sets the base for every arm movement. Scapular retraction means pulling it back and down toward your spine.
Try this:
- Sit or stand tall. Squeeze your shoulder blades together like you are holding a pencil between them.
- Hold for 5 seconds, then relax. Do 10 reps.
- Add a light resistance band for rows and external rotations once the pain-free moves feel easy.
Modifying Your Lifting Routine for Shoulder Pain
Modifying a lifting routine for shoulder pain is less about giving up exercises than changing how you do them. The biggest lever most lifters miss is equipment choice: the same movement pattern loads the shoulder very differently depending on whether you use a barbell, dumbbells, a cable, or a machine.
Grip, Stance, and Range Adjustments
- Grip width: A narrow or neutral grip usually puts less strain on the shoulder than a wide grip. On a bench press, a grip just outside shoulder width keeps the elbows closer to the torso and reduces the stretch on the front of the joint.
- Stance: A slight incline on the bench (15 to 30 degrees) can move the press angle away from the painful spot. A flat or declined angle often feels worse for impingement-type pain.
- Range: Shorten the bottom of a press so your elbow stays in front of your body, not behind it. Stopping an inch or two above the chest is a common modification.
- Tempo: Slow the lowering phase to three seconds. Most people find control improves and pain drops when the eccentric is slower.
Equipment-Specific Modifications
Dumbbells. Usually the first swap, because your hands rotate freely. On a press, use a neutral grip (palms facing each other) or a slight tilt. On rows, let the dumbbell hang and pull with your elbow, not your hand. Each side works independently, so the injured side can go lighter without stalling the healthy side.
Deloading and Progressive Overload
Deloading means cutting your weight or volume for a week to let tissue recover. Progressive overload means adding work over time so you keep getting stronger. Both matter here, but the order matters more.
| Phase | Weight | Sets and Reps | Goal |
|---|---|---|---|
| Deload week | 50-60% of normal | 2 sets of 8 | Calm irritation |
| Rebuild | 60-70% | 3 sets of 8-10 | Restore control |
| Progress | Add small load weekly | 3 sets of 8-10 | Build strength |
How to Train Legs With a Shoulder Injury
You can train legs hard while your shoulder heals; the trick is loading the lower body without asking your shoulder to hold weight.
- Leg press: Load the sled and press, keeping your hands on the handles, not gripping hard.
- Goblet squat: Hold a single dumbbell at your chest with both hands. Skip it if the front hold hurts.
- Split squats and lunges: Use dumbbells at your sides instead of a bar on your back.
- Hamstring curls and calf raises: Machines handle these with zero shoulder demand.
Warm-Up, Recovery, and Tissue Repair Habits
A good warm-up routine raises blood flow and prepares the joint for work. Five minutes is enough.
- Arm circles, small to large, both directions
- Band pull-aparts for the upper back
- Light isometric holds for the rotator cuff
- A few easy reps of your first exercise with no weight
Return-to-Sport Timeline and the Mental Side of Injury
There is no single timeline for a return to sport; it depends on the injury, your age, and your consistency. A mild strain may settle in weeks, a larger tear in months. What you control is the process: a phase-based roadmap with specific criteria for advancing.
A Phase-Based Return-to-Training Roadmap
Think of recovery as four phases. You do not skip phases, and you do not advance on a calendar date. You advance when you meet the criteria.
Testing Before You Advance
Before you move to the next phase, run a simple test. Complete the phase's key movements at the top of your current range with no pain during the session, then check the next morning. If pain is at or below a 2 out of 10 with no new soreness, you have your green light. If not, repeat the phase for another week.
The Mental Side: Fear of Movement
The mental side matters as much as the physical. A common pattern after a shoulder injury is kinesiophobia, or fear of movement. It shows up two ways: some avoid any movement that once hurt, slowing recovery because the joint and muscles need load to heal; others push too hard to prove the shoulder is fine, causing a flare that reinforces the fear.
A few strategies help:
- Set process goals, not outcome goals. "Complete three pain-free sessions this week" is more useful than "bench 225 by June."
- Use a pain scale, not a pain yes-or-no. A 2 out of 10 during a set is often acceptable. Sharp pain is not. Having a number removes the guesswork.
- Keep a short log. Note the exercise, the load, and the next-morning pain. Seeing a trend of good weeks is the strongest antidote to fear.
- Expect setbacks. A bad day does not mean starting over. It means repeating a phase, which is part of the plan.
When to Work With a Coach
A coach helps most when you are stuck, scared, or unsure what is safe, exactly the gap Doug Briggs Strength fills. A generic app cannot see your form or adjust your plan when your shoulder talks back.
A good coach will:
- Screen your movement and set a safe starting point
- Build a plan around your injury, your goals, and your schedule
- Adjust load week to week based on how you respond
- Keep you accountable so you stay consistent
Frequently Asked Questions
Can I do bicep curls with a shoulder injury?
Yes, in most cases, but the setup matters more than the exercise itself. Standing barbell curls can pull the shoulder into a forward, rounded position. Try seated dumbbell curls with your back supported, or use a preacher bench to take the shoulder joint out of the equation. Start with light weight and stop if you feel any pinch. If curling triggers pain, swap to isometric holds until the shoulder settles, then rebuild range of motion gradually.
What exercises should I avoid if I have a shoulder injury?
Skip anything that drives the shoulder into internal rotation under load: behind-the-neck presses, upright rows, wide-grip bench presses, and dips below parallel. These positions narrow the space in the shoulder joint and aggravate impingement. Also avoid heavy overhead pressing until pain-free range of motion returns. If an exercise causes a sharp catch or pinch, that is your signal to modify the angle, lighten the load, or replace it entirely with a shoulder friendly variation.
How do I modify my lifting routine for shoulder pain?
Start by swapping the painful movement pattern, not the whole program. If overhead pressing hurts, switch to a landmine press or a neutral-grip dumbbell press at a lower angle. Reduce range of motion to what stays pain-free, then add back a few degrees each week. Cut volume by 30 to 50 percent for the first two weeks, keep intensity moderate, and use a deload week every fourth week. Progressive overload still applies, just at a slower pace than a healthy shoulder would allow.
When is it safe to return to overhead pressing after an injury?
Return when you can press a light dumbbell overhead through a full, pain-free range of motion with no compensation, and when isometric holds at 90 degrees feel stable and strong. That usually takes 6 to 12 weeks for mild impingement or tendonitis, longer for a labrum issue. Rebuild with a neutral grip, then move to a barbell. If pain returns, back off to the last pain-free weight. A structured return-to-sport timeline beats guessing every time.
A shoulder injury tests your patience as much as your strength. The athletes who come back strongest are the ones who assess honestly, modify smartly, and progress on a plan instead of on hope.
That is where Doug Briggs Strength comes in. With more than 30 years of coaching experience, personalized programming, and a focus on lasting strength and mobility, Doug builds a plan that fits your injury and your goals. Book a free consultation and get a safe path back to the bar.